Digitakt II presets: five ways to save more than a sample
A good preset saves more than a sound. It saves the setup that made that sound useful: the machine, the modulation, or the MIDI controls I would otherwise have to build again.
In this tutorial I put five ideas to work on the Digitakt II, from tempo-following loops and synth patches to MIDI mappings and different machines on the same track. The point is to spend less time setting things up and more time making music.
Watch the full tutorial
Jump in: Loop presets · 0:00 / Wavetables · 2:22 / Single-cycle synth · 4:59 / MIDI · 8:02 / Preset pool · 10:14
1. Keep a useful loop ready
I start with a pumping noise loop, then try a shaker. Once a loop follows the project tempo, saving it as a preset means I can bring that setup into another project without finding the sample and configuring it again.
For these examples I switch to Re-Pitch with FUNC + SRC. Re-Pitch changes the pitch as the tempo changes, but I like how clean it sounds on drums. Stretch is another option, particularly when the original and project tempos are close. Those are different sounds, so listen to the tradeoff instead of treating one as the right choice every time.
When it works, open Preset, choose Save, pick an empty slot, and give it a useful name and tag. I tag the noise example as a sound effect.
2. Turn a wavetable into an instrument
Grid is still useful even with the Slice machine available. I load a factory wavetable from Oscillators → Wavetables, set Grid to 64 slices for this example, and enable looping. In keyboard mode, a tiny section becomes a pitched sound.
One detail matters here: choose a numbered slice starting point rather than NOTE. Moving Slice Select then changes the part of the wavetable being looped.
I assign an LFO to Slice Select, use a ramp in HALF mode, and give it enough depth to move through the table. Now the sound changes as it plays. I save that patch as “MorphScan” with a Synth tag, so the sample and the way I am playing it are ready together.
If you want more sounds to explore with this technique, my Ultimate Sampler Synthesis Pack includes 450 single-cycle grids and over 500 wavetables.
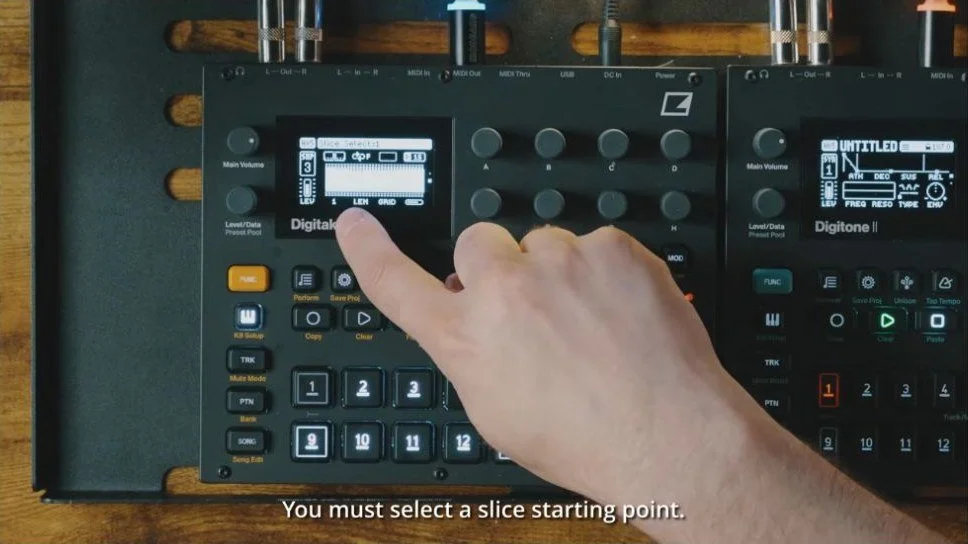
3:47 · Choosing a numbered slice before playing the wavetable as a pitched instrument.
3. Save a single-cycle synth patch
For a different kind of synth sound, I load a factory sawtooth from Oscillators → Single cycles into the One-shot machine and set it to CYCLE. A little modulation of Tune gives it the unstable character I am after.
I keep the depth small, below 0.30 in this example. Too much takes it out of tune quickly. TRIG mode restarts the LFO with each note; switching to FREE lets the modulation keep moving, so each note can catch it at a different point.
I add ping-pong delay and a big reverb while I play, then save the synth patch as “BoardsLeadSY.” The exercise is the sound design: start with a simple waveform, add controlled movement, and save something you want to reach for again.
4. Build a MIDI mapping once
MIDI presets are the ones I use most. I do not want to look up and label the same controls every time I connect an instrument.
On a blank track, FUNC + SRC lets me choose MIDI. I enable a channel and match it to the receiving instrument. For MIDI learn, connect that instrument’s MIDI output to the Digitakt’s MIDI input, then use FUNC + a long press on a CC encoder and move the control on the instrument.
After learning the CC, enable it and give it a useful name, such as cutoff or resonance. Save the mapping as a preset. In the video I also show an Analog Heat preset I use to change settings with my patterns. It is a practical way to make an external piece of gear feel more integrated with the sequencer.
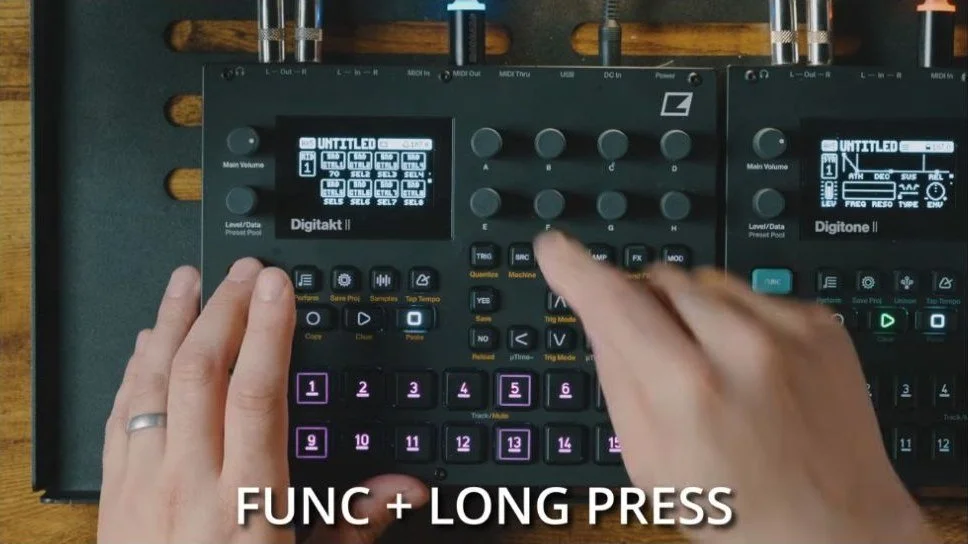
8:49 · FUNC + a long encoder press opens MIDI learn for the selected CC.
5. Put different machines on one track
Loading another sample onto a track normally leaves you working with that track’s machine. Preset locks open up a different possibility: a step can call up a saved sound with its own audio machine.
That means I can use a single-cycle sound, a sliced sample, or a stretched loop on different steps of the same track. I demonstrate this by adding presets to the project’s preset pool and choosing them while holding individual trigs. Their parameters can still be locked per step.
Try this: make presets share a track
Load a few presets into your PRESET pool.
Enter a few steps into your sequencer.
Hold down a step and turn the LEVEL encoder to select the preset that will play on that step. Repeat this on a few other steps, choosing a different preset for each.
Play the pattern and change a parameter on one of those steps. Listen to how much variety you can get without adding another track.
Start with sounds already on the Digitakt. You do not need to buy a pack to try the ideas in this tutorial.
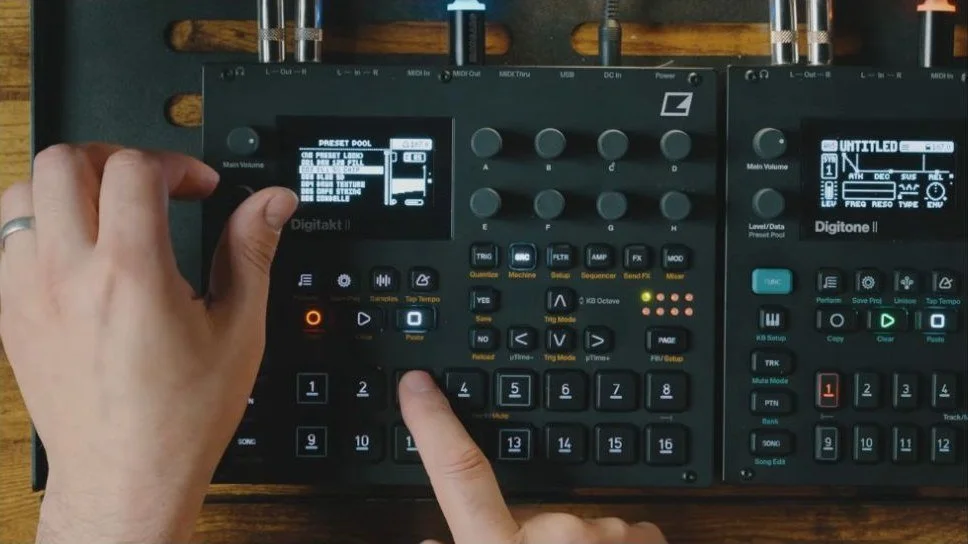
11:33 · Hold a trig and turn Level/Data to choose its sound from the preset pool.
Keep exploring
If you want more raw material for sampler synthesis, my Ultimate Sampler Synthesis Pack is another place to explore. For help turning these ideas into your own workflow, book a one-on-one lesson.
You can also explore my Patreon and performance templates, or join the email list for new tutorials, templates, sample packs, and lessons.
Find the Digitakt II
These are affiliate links. I may earn a commission if you buy through them, at no extra cost to you.
US: zZounds ↗ / Guitar Center ↗ / Perfect Circuit ↗ / Sweetwater ↗
EU: Thomann ↗
Check the retailer for current availability, delivery options, and pricing.